Recently I spoke at a Microsoft Project Server event here in Switzerland on the topic of Extending Project Server and using small pieces of JavaScript with jQuery to make little changes for big effects. One of my demos was to correct the following annoyance that many of us have probably come across but have no out of the box way to fix.
Project Detail Pages column alignment issues
Example
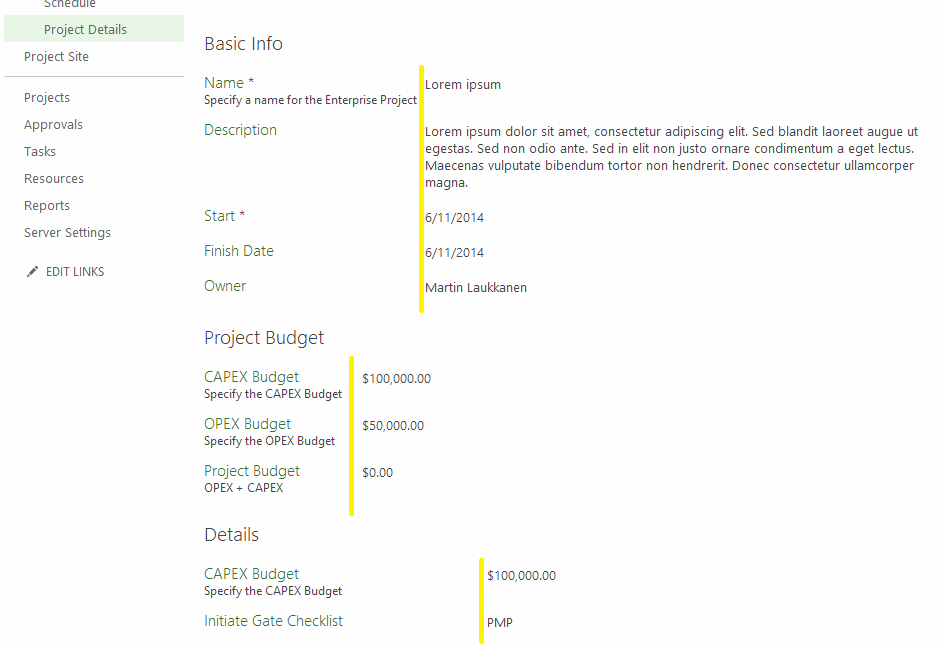
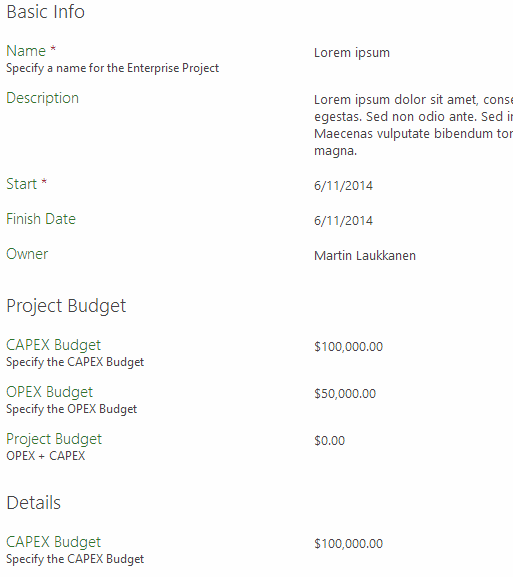
In yellow I have highlighted the issue that I’m talking about in case it is not obvious in the screenshot. As you see the alignment is actually based on the length of the longest custom field displayed in the web part, so as in the above example where we have used separate webparts to break up the webpage with headings the width of each column is unpredictable.
jQuery to the rescue
This is a great example of using jQuery as it shows how ridiculously simple some things can be to change! So let’s walk through the solution here if you’ve not done this before, as you will see the possible usage of this kind of “fix” is vast.
“Debugging” in Chrome or IE
The first thing you need to do to here is to identify the html element(s) in question, so the easiest way to do that is to use the “Inspect Element” feature available in both IE and Chrome browsers (and probably all others too), you’ll find it on the right click menu

When selected the inspect element will open up the developer console of your browser and focus on the specific element under the mouse, in this case the “Description” field text label.
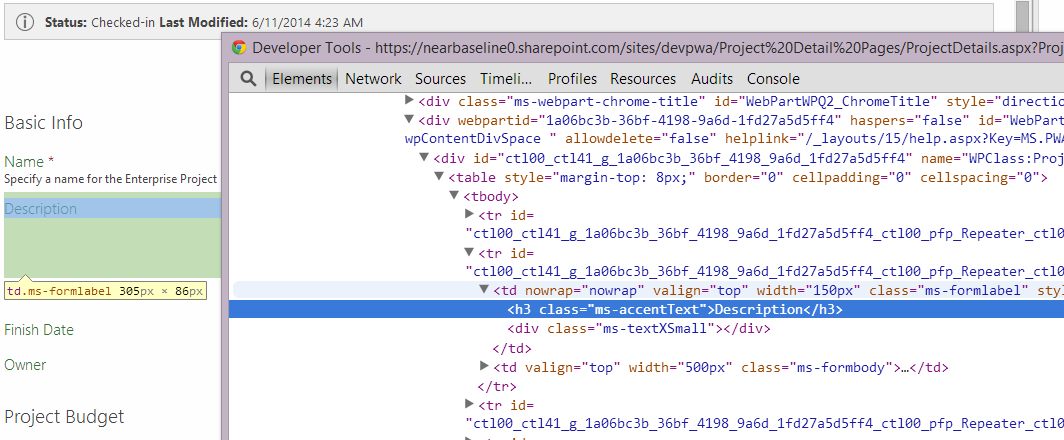
Now you can browse the page source and as you see each element is highlighted, neat!
Now we can start using jQuery to select our columns to modify, start by dynamically loading the jQuery library using the following script:
var jq = document.createElement('script');
jq.src = "//ajax.googleapis.com/ajax/libs/jquery/1/jquery.min.js";
document.getElementsByTagName('head')[0].appendChild(jq);
Now that we have jQuery available you can again look at the source and think about what we need to ‘select’, in this case we can see that our Description label is in a h3 inside of a table (tbody > tr > td) and specifically it has a class of “ms-formlabel”. Cool so in jQuery we can now select all such elements like this:
$("tr td.ms-formlabel")
Best thing is that being JavaScript all elements are selected and can be used in an array, but even better we can directly update all items like this:
$("tr td.ms-formlabel").width("300px");
Neat hey? If you run that command in the console immediately all the columns will update to be 300px wide!
Permanently applying fix to the page
So now we have our script let’s add it to a Content Editor Web Part (CEWP) on the page itself, to do that we need to wrap our line in some html which loads the jQuery library and runs the script when the page is ready, like this:
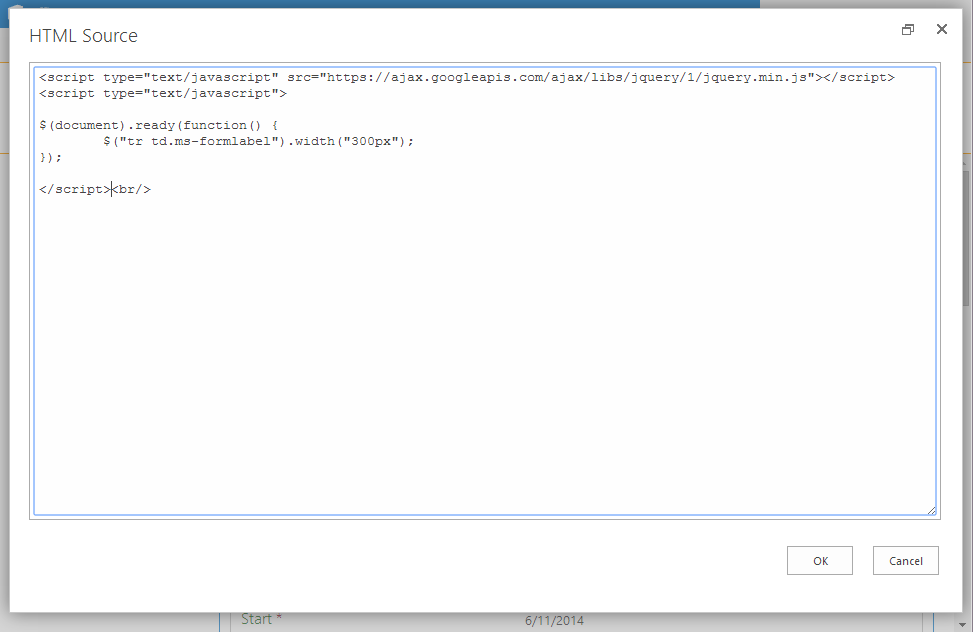
<script type="text/javascript" src="//ajax.googleapis.com/ajax/libs/jquery/1/jquery.min.js"></script>
<script type="text/javascript">

$( document ).ready(function() {
	$("tr td.ms-formlabel").width("300px");
})

</script>
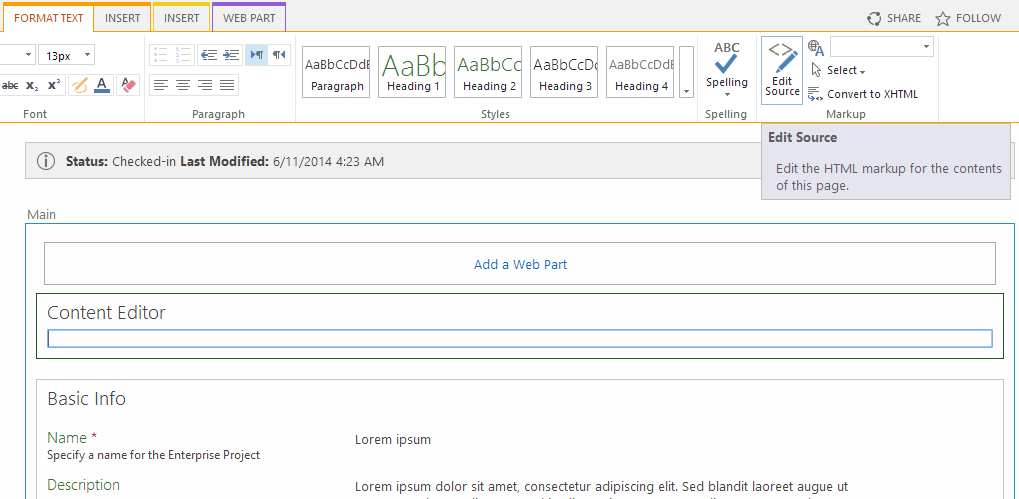
Now edit the PDP web part page, and add a Content Editor web part to it, then simply add the above HTML content to the web part HTML source like so:
First add the Content Editor web part and use the Edit Source ribbon option
Then paste in our html script
Now each time the page is loaded the script is run and all columns are aligned to 300px looking something like this:
Enjoy!