by Martin Laukkanen | Jan 18, 2017 | SharePoint
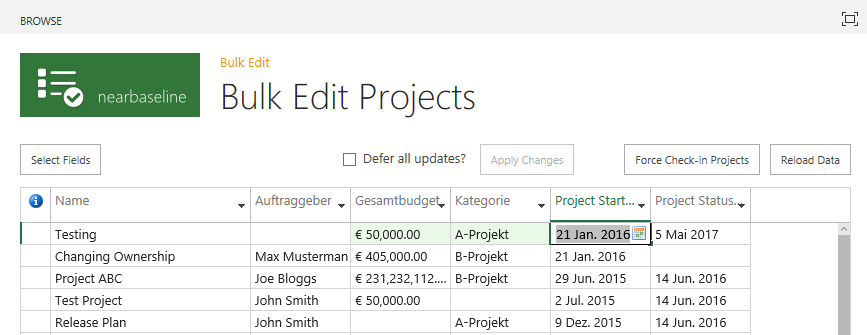
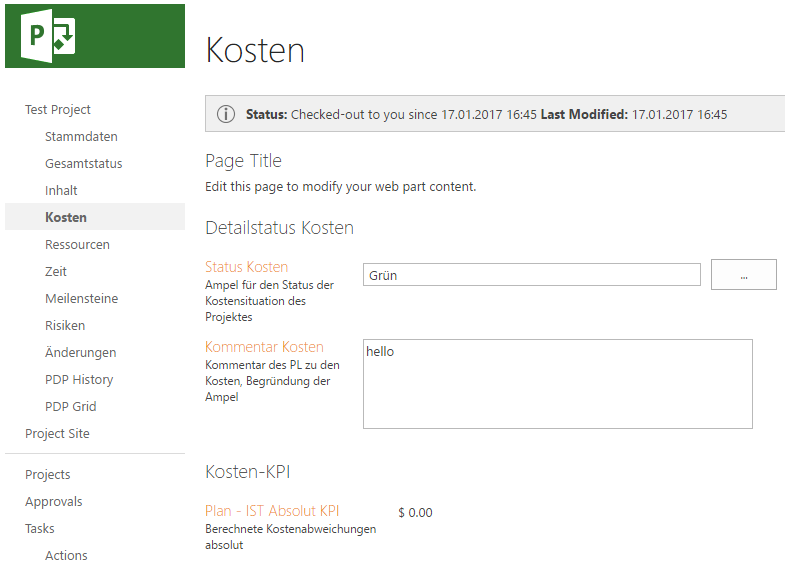
One of those small annoyances that I find myself always fixing (or being asked to fix) is the default page layout of a Project Detail Page in PWA, for example:
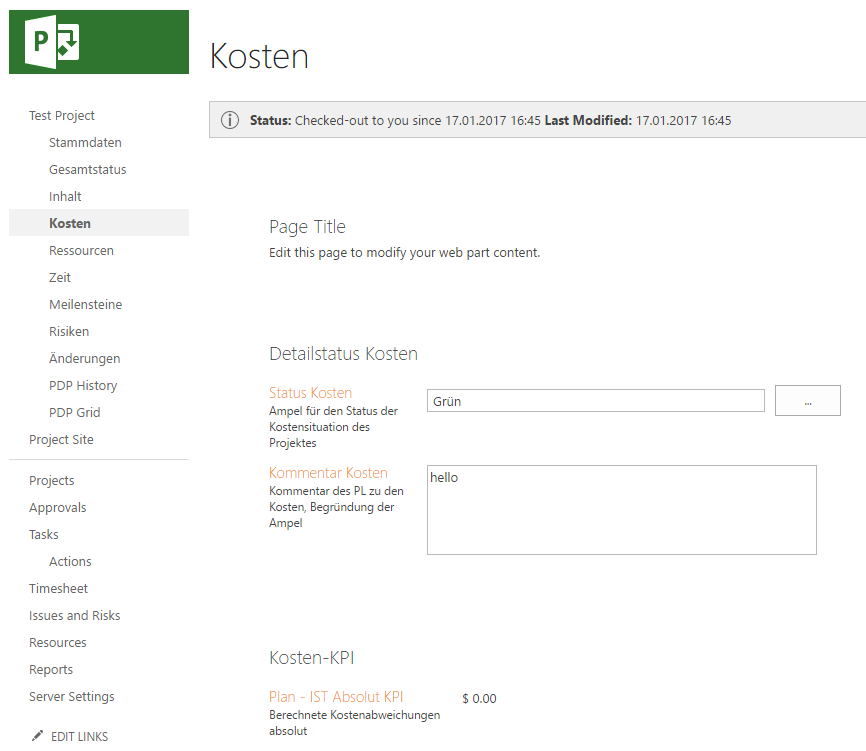
Specifically around and between each web part on the page there is a large margin that even (partially) exists when you insert hidden webparts. Additionally the content alignment is out compared to other pages; ie the page title “Kosten” in this case is not left aligned with the page content and sub headings.
Easily fixed with a little CSS
This can be easily fixed with (you guessed) a content editor webpart and the following html style sheet:
<style type="text/css">
.ms-webpartPage-root {
    border-spacing: 0px;
}
</style>
The value was previously “20px”, so if 0px padding is too little then you can try a different value. Additionally there are lots of other styles that you might like to play with, for example: “.ms-PartSpacingVertical” is by default empty but is useful if you need a very specific gap between web parts.
When inserted in a hidden content editor web part anywhere in the page results in:
Now that page title is a little too close, but now that can be easily edited as needed.
Futhermore, while I’ve not included it in this example, if you want to remove absolutely all spacing then add the following CSS:
.ms-webpartzone-cell {
    margin: auto auto 0px;
}
That 0px value changed from the default of 20px removes all spacing including the margin that hidden web parts have so if like me you find yourself with lots of hidden content editor webparts with scripts and such, then this can be useful.
Hope someone else finds that useful.
by Martin Laukkanen | Oct 17, 2016 | Reporting
Microsoft PowerBI is one of the best new BI app’s from Microsoft since SSRS (which still doesnt work in the cloud?!), however there is no out-of-the-box web parts available for Office365 or Project Online users unless of course you’re happy to publish your reports unauthenticated to the whole world by using the PowerBI embed option!
There is an add-in available (Power BI Tiles for SharePoint) on the SharePoint app store but if you just want a quick PowerBI report displayed I couldn’t find anything out there, so after reading about a great example of creating your own Provider hosted app in the following blog; Part 1: How to embed PowerBI in a SharePoint site, I thought that there must be an easier way.
Content Editor Web Part and a little JavaScript
Note: this solution only applies to Office 365 and Project Online, sorry on-prem people..
While it would be very easy to embed a ‘Shared’ report into an iFrame in a content editor web part (CEWP), that requires the report to be accessible anonymously which is out of the question in just about any Corporate instance. So the big challenge with displaying a PowerBI report is that you must first authenticate the current user to Microsoft’s servers, this is were ADAL.js comes in, Microsoft’s Azure AD JavaScript library makes this all possible.
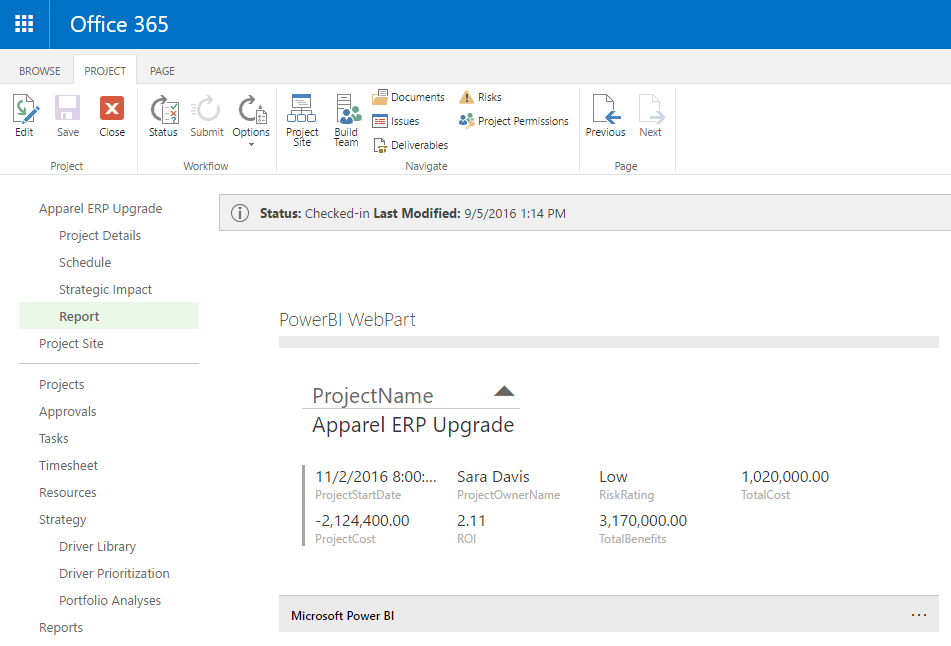
Screenshot of the finished product:
Overview of the Script
The script while short (scroll down for a sneak peak), does a lot!
- It will authenticate the user with Microsoft – normally this will take the users current logged in session so you won’t see the prompt
- On first load it will request permission to access PowerBI – this step only happens once per user and covers all web parts / reports configured
- Once it has a login token it will cache it for future requests (it’s valid for a few hours/days I think?)
- Now finally using the security token it will load a specific report in a iFrame displayed in a CEWP on the page
Additionally using an oDataFilter you can pass parameters like ProjectUid or similar to the report.
Requirements
This solution requires the following:
- Office 365 / Project Online tenant
- An Azure AD application- but we don’t need anything fancy like dirsync setup (And note that every O365 tenant today has an Azure AD directory automatically created so there is no additional cost here)
- All users who will view the web part require at least the PowerBI free license in O365
- To setup this you’ll need permissions to configure Azure AD, so probably global admin in Office 365.
Configuration Steps
First up you’ll need to create an Azure AD Application in your tenant to allow permissions to view PowerBI reports for your users, to do so go here (don’t panic this is not a full blow SharePoint app we’re creating, it’s just a simple xml manifest that defines which permissions this script will be allowed!):
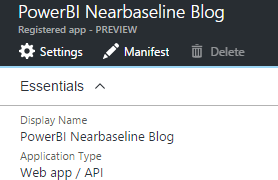
1. Register the Azure AD Application
Register an Application for Power BI – https://dev.powerbi.com/apps
Configure the following settings:
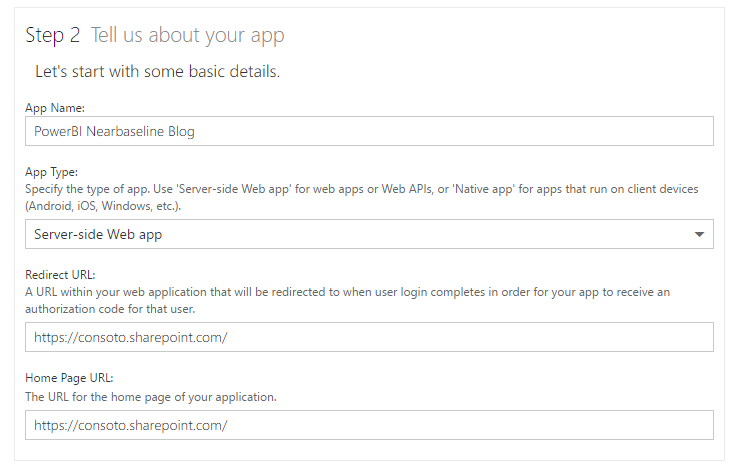
The most important setting is the Redirect URL, that must match your Office365 tenant name, and it could be a subsite but ADAL will allow any site below this URL to use the script.
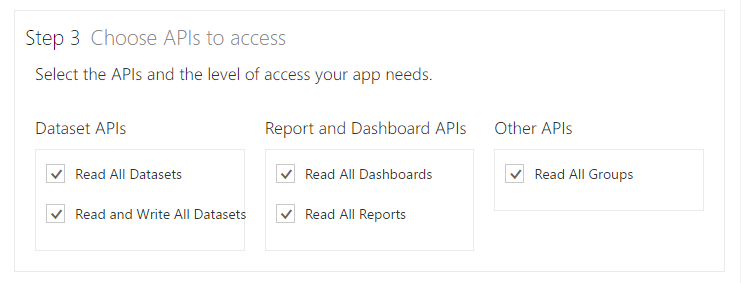
Then make sure to pick the appropriate permissions, I’m going to go with everything for this example.
Finally click Register App, and it will create a Client ID (a GUID), save this we’ll need it later.
2. Update the Application registration to include Implicit Flow
Unfortunately as nice as that MS web site in the previous step was, it configures only specific types of apps, one that relies on a secret key in addition to the client Id. This is not suitable for a JavaScript app as that would mean the secret key is in plain text in the script! What we need is to enable “implicit flow”, in short this means that only short lived specific access tokens can be issued by this app (ie the kind you get when you logon to O365) negating the need for the secret code.
However we now need to edit this app to enable this functionality, if you skip this step then when you try to use the script, you’ll see the following error:
ADAL error occurred: AADSTS70005: response_type 'token' is not enabled for the application
Trace ID: ebe80ce0-8365-4f89-b2ee-d10218ffa595
Correlation ID: 491b009c-907b-4c8d-8605-efa34347ff47
So before you go further you’ll need to update the application manifest in Azure AD.
Firstly open https://portal.azure.com and login with your Office365 admin user credentials (note that using the old Management Portal will require a subscription, but you don’t now using the new portal if all you’re doing is editing Azure AD).
Now from the left menu select Azure Active Directory, then the default directory details should load, if not you’ll need to select the appropriate directory configured by your Admin. Click on App Registrations, then click on the app with the name you created in the previous step.
Now you can edit the Manifest from the top menu, click Manifest and you’ll need to just make one change:
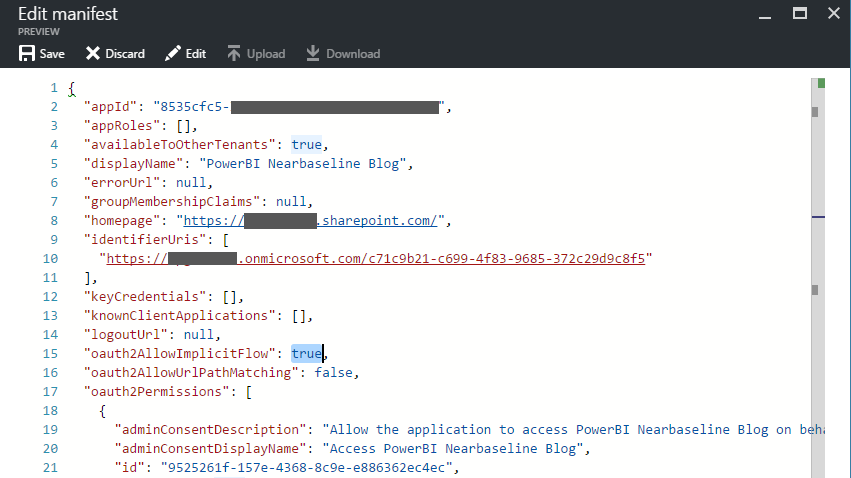
By default the option oauth2AllowImplicitFlow (line 15 above) is set to false, change that to true by editing the value, then save the changes.
Okay, that was the hard bit.
Update Oct 2017: You will need to update your ReplyUrl in the manifest to include a wildcard on the end, that will be required if this webpart is installed on a PDP which has a URL: https://siteurl/PWA/Project%20Detail%20Pages/pdpname.asp?ProjUid=1324132412124 or similar. Obviously the ProjUid changes for each project, so a reply url of something like: ‘https://contoso.sharepoint.com/*’ or more specifically (for better security) ‘https://contoso.sharepoint.com/sites/pwa/Project%20Detail%20Pages/*’.
3. Publish your PowerBI report and get the Guid
The script I’ve put together is pretty simple, it just authenticates the user then loads a report from PowerBI using the Guid of the report and passing a few other configuration options to suit the requirements (ie display a simple report with minimal UI). So for this you’ll need a report published to PowerBI under your workspace, I’ve just created a simple Project Status report that shows some details and takes a ProjectId parameter:
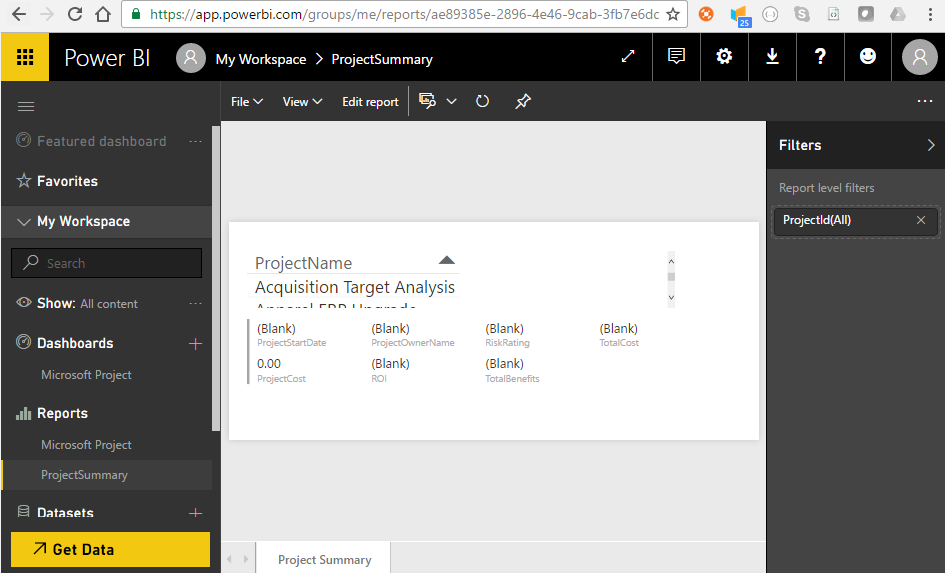
Once published to PowerBI you can see the Guid of the report in the browser URL bar, in this case: ae89385e-2896-4e46-9cab-3fb7e6dd16c4
Otherwise you can see the report level filter configured; “ProjectId“, we’re going to use that in the script as well as we’ll be adding the webpart to a Project Detail Page (web part page).
4. Configure the script
So here’s the script:
<script src="https://ajax.googleapis.com/ajax/libs/jquery/1.11.1/jquery.min.js"></script>
<script src="https://secure.aadcdn.microsoftonline-p.com/lib/1.0.0/js/adal.min.js"></script>
<script type="text/javascript">
(function() {
    /// PowerBI SharePoint WebPart
    /// By Martin Laukkanen - TPG The Project Group
    /// Including some of http://paulryan.com.au/2015/unified-api-adal/
    /// v0.2.20161016
    "use strict";

    var subscriptionId = '[mycompany].onmicrosoft.com';
    // Copy the client ID of your AAD app here once you have registered one, configured the required permissions, and
    // allowed implicit flow https://msdn.microsoft.com/en-us/office/office365/howto/get-started-with-office-365-unified-api
    var clientId = '00000000-0000-0000-0000-000000000000';

    var config = {
        subscriptionId: subscriptionId,
        clientId: clientId,
        postLogoutRedirectUri: window.location.origin,
        resource: 'https://analysis.windows.net/powerbi/api',
        prompt: 'none',
        cacheLocation: 'localStorage', // enable this for IE, as sessionStorage does not work for localhost.
        embedUrlBase: 'https://app.powerbi.com/reportEmbed',
        reportUid: 'ae89385e-2896-4e46-9cab-3fb7e6dd16c4',
        oDataFilter: "ProjectData/ProjectId eq '" + window.PDP_projUid + "'"
    };

    var authContext = new AuthenticationContext(config);
    // Check For & Handle Redirect From AAD After Login
    var isCallback = authContext.isCallback(window.location.hash);
    authContext.handleWindowCallback();
    if (isCallback && !authContext.getLoginError()) {
        window.location = authContext._getItem(authContext.CONSTANTS.STORAGE.LOGIN_REQUEST);
    }

    // If not logged in force login
    var user = authContext.getCachedUser();
    if (!user) {
        authContext.login();
    }

    // Acquire token for resource.
    authContext.acquireToken(config.resource, function(error, token) {
        // Handle ADAL Errors.
        if (error || !token) {
            console.log('ADAL error occurred: ' + error);
            return;
        }

        // Store our token
        config.authToken = token;

        // Update the report once the page has loaded
        $(document).ready(function() {
            // Update the iFrame
            var iframe = $('#powerBiframe');
            var url = config.embedUrlBase + '?filterPaneEnabled=false&navContentPaneEnabled=false';
            iframe.on('load', postActionLoadReport);
            iframe.attr('src', url);

            // Post the access token to the IFrame
            function postActionLoadReport() {
                var iframe = document.getElementById('powerBiframe');
                var computedStyle = window.getComputedStyle(iframe);
                // Construct the push message structure
                // this structure also supports setting the reportId, groupId, height, and width.
                // when using a report in a group, you must provide the groupId on the iFrame SRC
                var m = {
                    action: "loadReport",
                    reportId: config.reportUid,
                    accessToken: config.authToken,
                    oDataFilter: config.oDataFilter,
                    width: computedStyle.width,
                    height: computedStyle.height
                };
                var message = JSON.stringify(m);

                // push the message.
                iframe.contentWindow.postMessage(message, "*");;
            }
        });
    });
})();

</script>
<iframe id="powerBiframe" width="660" src="" height="296" frameborder="0"></iframe>
Note: The script is a .html file, this saves having to have two separate files. Save this file as “PowerBiWebPart.html”.
The script is based on a great ADAL.js example from: http://paulryan.com.au/2015/unified-api-adal/, I’ve just taken the authentication part and then added the PowerBI iFrame components.
What you’ll need to update are the following lines:
- Line 11: Replace [mycompany] with your O365 tenant name
- Line 14: Paste your client id for the PowerBi Azure app registered in step 1 here.
- Line 24: Update the reportUid with your report’s Guid from the last step.
- Line 25: Update the oData parameters as required for your report. You can see I’m using window.PDP_projUid which is a globally declared variable by Project Online that is available in all PDPs to provide the current project’s Guid.
- Line 86: Set the iFrame width and height desired to fit the report in the web part. For the height add 56 px to fit in the PowerBI bar at the bottom.
I won’t go through the whole script in detail, read the comments if you want to know what’s happening, however I will note that I have added the following query strings to the eventual URL of the report (line 57):
‘?filterPaneEnabled=false&navContentPaneEnabled=false’
They will hide both the filter pane from the right and the report page view from the bottom. (if anyone knows the query string to hide the PowerBI bar at the bottom please post in the comments!)
5. Add the Script to a Content Editor Web Part
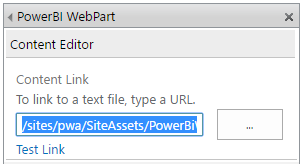
Last steps: upload this script somewhere into your SharePoint site collection, e.g. /sites/pwa/SiteAssets and keep a note of the URL.
Edit the web part page / project detail page that you want to add this to, and add the Content Editor Web Part:
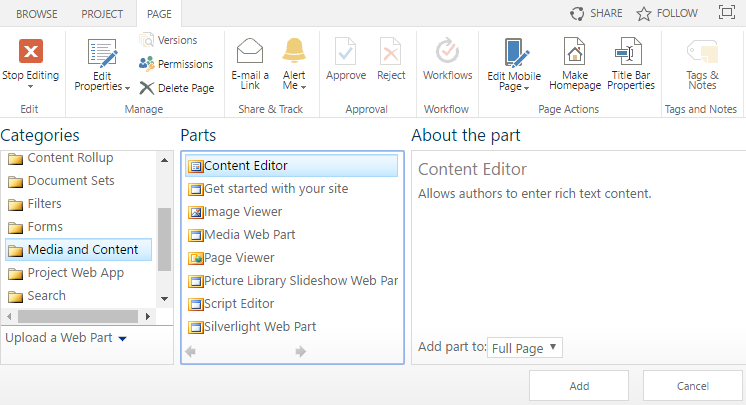
Next edit the web part properties and update the URL to point to your script, for example; /sites/pwa/SiteAssets/PowerBiWebPart.html
You can leave the rest of the web part settings as defaults, now save the page and stop editing, on refresh you should see this:
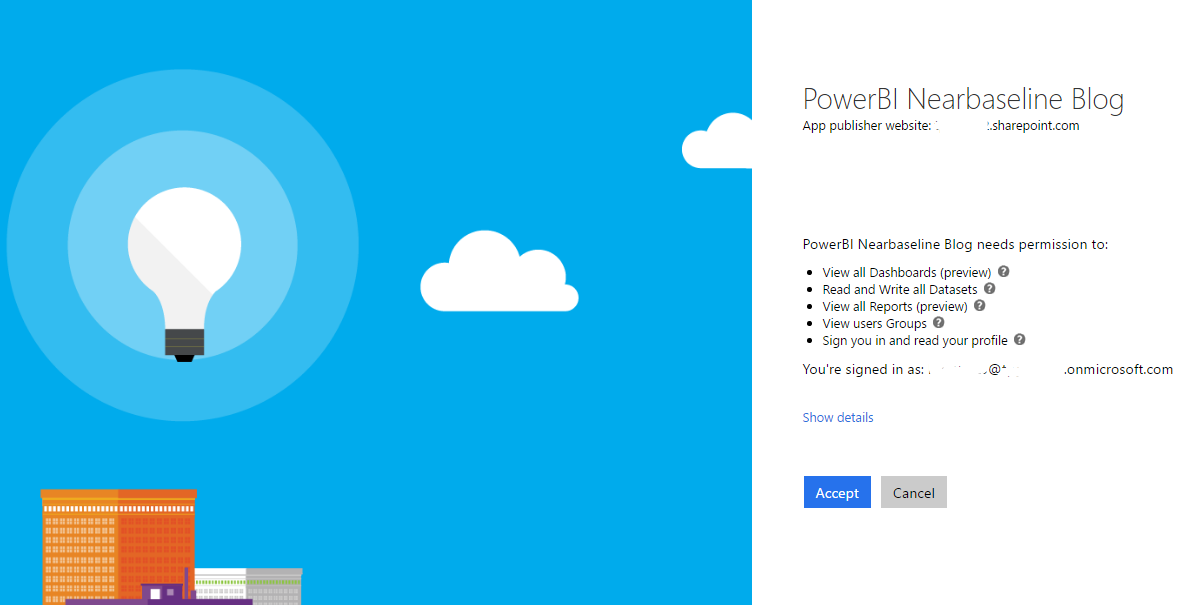
The script has just taken over the browser to authenticate you and now the Application permissions need to be approved by the user. You should not have seen the normal logon prompt as the in the script on line 21 we have configured “prompt”: “none”, but every user will still see the above consent form.
Note: I haven’t tested “admin_consent” prompt setting which in theory should allow the admin to consent on behalf of all users, I’ll update this when I get a chance to try that out
Once you Accept then you should be immediately redirected back to the page you were in:
Neat.
As you can see that PDP is open on a project called “Apparel ERP Upgrade” and the report filter has been applied successfully!
Final Words
The user experience in these OAuth2 authentication with consent flows can be a bit weird, even more-so in this case where it is a web part in a page that is causing a full page redirect (and return). Not much can be done about that as OAuth2 requires this flow to be 100% in the control of the authentication provider, ie Azure AD here, therefore it is not possible to hide this in a frame or popup window or anything like that.
Fortunately once done the token is cached for subsequent requests and so only once per day or so (longer I think???) will the authentication redirect happen. Additionally after the initial user consent is granted the authentication will automatically return without further prompting, it just might look a bit weird on a slow connection though.
Finally, if you want to display multiple reports on one page, don’t add the webpart to the page more than once, I found that the authentication gets very confused when the token is not in the cache. Instead update the script to load multiple iFrames or just load a dashboard instead.
Enjoy! And please leave a comment below if you find this useful!